
Note: this blog post focuses on the deployment part of the development workflow and not on dockerization or best practices of the application code. Therefore, I will be using a very simple project example to illustrate this and focus only on the deployment workflow.
Github repositories for this blog post:
- Simple frontend - Angular 9 app that exchanges data (read and write) with backend.
- Simple backend - Node.js 12 app that communicates with Postgres database and serves a REST API.
- DevOps project - Defines the architecture and all DevOps tools for deployment of our app.
Simple frontend communicates with Simple backend to send and receive data. Simple backend includes a Postgres database where the data is read from and written to. DevOps project pulls together the entire app and includes scripts for deployment.
I will not be including full code in this blog post. For any code related issues, you can refer to the appropriate Github repository.
Our goal
We are working on a web application with a server, frontend and a database. At this point we have enough to start thinking about deployment; whether to show our client what we have done so far or to prepare a production release. We want our deployment to be fast, reproducible, simple and completely automated. We don’t want to worry about whether our server has all packages installed, what commands to run during the update or SSL certificates. How do we do it?
… Well, there are many ways and the one presented in this post is just one of them. My proposed procedure involves the following technologies:
- Docker for packaging our code into containers,
- Docker hub or any other Docker container registry for distribution of containers,
- Docker swarm for container orchestration and secrets management,
- Ansible for single-command, reproducible deployments and updates,
- nginx-proxy container for the entry point of our application,
- letsencrypt-nginx-proxy-companion container for automating SSL certificates.
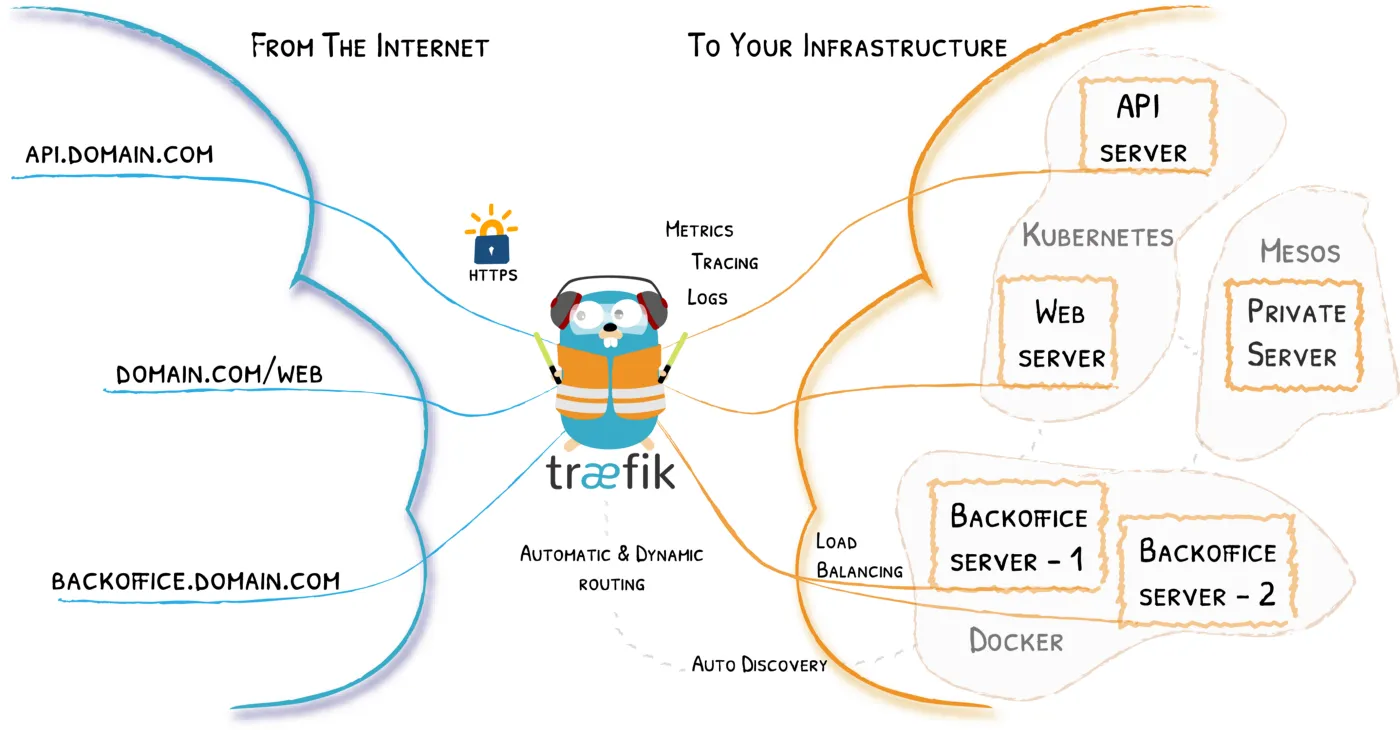
At this point I want to mention that the last two components can be substituted with a tool like Traefik, which I will discuss in a future blog post.
Our plan
Here are the steps we will take to implement this workflow:
- Dockerize our application (frontend and backend). We will assume this has already been done.
- Modify our dockerization to support Docker swarm and potentially optimize the speed of building images. When we are deploying multiple times per day, we don’t want our build process to take too long.
- Modify our migrations and seeds to support Docker swarm.
- Create a release script, which releases the image of our application and publishes it to the container registry.
- Create a testing stack file to test our system locally.
- Create a production stack file for production deployment.
- Write an Ansible playbook to install packages, create secrets and deploy our swarm.
Why Docker swarm? Why not just Docker compose?
You might be wondering why I choose to deploy using Docker swarm and not Docker compose. To be truthful, you could deploy with compose, but we have to keep in mind that Docker compose was designed as a tool for local development. This means that it doesn’t support any scaling, load balancing or orchestration of our containers. Even if your application is not expected to scale beyond one server, Docker swarm is so simple to implement, I don’t see a reason to use Docker compose when it comes to a microservice oriented application. Additionally, Docker swarm also supports secrets, which is a neat feature to allow us to secure our application secrets (like passwords or database accesses).
With that said, I still sometimes use Docker compose to deploy, when the application is very simple (like a single web page) and doesn’t require any secrets.
Dockerization
Backend
Looking at our Simple backend, the dockerization process is pretty standard.
Here is the Dockerfile:
# This build stage extracts dependencies and devDependencies from package.json ...
# ... so that version in package.json doesn't mess up layer caching
FROM endeveit/docker-jq AS deps
COPY package.json /tmp
RUN jq '{ dependencies, devDependencies, scripts }' < /tmp/package.json > /tmp/deps.json
FROM node:12.16-alpine
ARG NODE_ENV=production
ENV NODE_ENV $NODE_ENV
EXPOSE 3000
# install bash in alpine
RUN apk add --no-cache bash
RUN mkdir -p /usr/src/app && chown node:node /usr/src/app
WORKDIR /usr/src/app
COPY docker-entrypoint.sh /usr/local/bin/
RUN chmod +x /usr/local/bin/docker-entrypoint.sh
USER node
# Copy package json without version from previous build stage
COPY /tmp/deps.json ./package.json
COPY yarn.lock ./
# Don't create lockfile using --frozen-lockfile
RUN yarn install --frozen-lockfile
COPY . .
ENTRYPOINT ["bash", "docker-entrypoint.sh"]
CMD [ "node", "src/index.js" ]We copy our package.json and yarn.lock, install dependencies, copy application code and call the node process. There are, however, a few specialities:
-
Build stage
package.jsontransformationWhen we release our Docker image (see section below on release script), we also bump version in
package.json. This is a good practice but it has a problem - Docker will detect a change in the file and rebuild entire node_modules all over again each time we build. We don’t want this to happen; not only because the build would be slower, but also because during image push to the container registry, the entire node_modules layer would be pushed all over again. This is bad, as it can take up to 10 minutes.Therefore, we introduce an additional build stage, which creates a new file
deps.json, which is basicallypackage.jsonwith onlydependencies,devDependenciesandscripts- that is all we need. This way, even when version changes, Docker will not see a difference (unless, of course, we added a new script our installed a dependency) and it will not rebuild node_modules. -
Installing bash
I use Alpine Linux as a base for my container. While this means that our image will be smaller, it also means that there is no bash installed. This can pose a problem when running the entrypoint script (below). Therefore, I install bash in Alpine to avoid this problem.
-
Entrypoint script for Docker secrets
Docker secrets are injected into a container by Docker swarm through a special file, which the application should read from the file system of the container. By convention, paths to these files are given to the container as an environment variable ending with
_FILE. For example, if our app accepts a secretDB_PASSWORD, we should also make sure it acceptsDB_PASSWORD_FILE. IfDB_PASSWORDis not present, we fall back to readingDB_PASSWORD_FILEfrom the disk and loading its contents into theDB_PASSWORDvariable.In order to avoid having to do this in the application code (e.g. using fs module in Node), script
docker-entrypoint.shdoes this automatically for us. All we have to do is specify all secrets that we will support in the file. Here is the excerpt fromdocker-entrypoint.sh, which defines all secrets that my app accepts:# all secrets of the application file_env 'DB_USERNAME' file_env 'DB_PASSWORD'This will make sure that if
DB_USERNAME_FILEorDB_PASSWORD_FILEare supplied through environments, entrypoint will read the contents of these files and inject them intoDB_USERNAMEandDB_PASSWORDrespectively. Therefore, our app does not have to worry about doing this, except in migrations file (see below section on migrations and seeds).In your app you should determine, which of the environment variables that your application needs are secret and which ones arent. Some examples of secrets are:
- database accesses
- jwt secrets
- api keys
What I don’t consider to be a secret (this is debatable):
- database name
- ports
- links to any external APIs
Adjusting migrations for Docker secrets
When we use Docker secrets in production, migration and seed processes will not be able to access the database, if they are run as a separate process (e.g. using docker exec command), as they will not have access to variables, which are read from secret files by the entrypoint script. Therefore, we need to implement this logic directly into the file containing our seed/migration config.
Here is how it looks like for Sequelize:
require("dotenv").config();
const fs = require("fs");

/* this part is important */
if (process.env.DB_USERNAME_FILE) {
  process.env.DB_USERNAME = fs.readFileSync(
    process.env.DB_USERNAME_FILE,
    "utf8",
  );
}

if (process.env.DB_PASSWORD_FILE) {
  process.env.DB_PASSWORD = fs.readFileSync(
    process.env.DB_PASSWORD_FILE,
    "utf8",
  );
}

module.exports = {
  database: process.env.DB_NAME,
  username: process.env.DB_USERNAME,
  password: process.env.DB_PASSWORD,
  host: process.env.DB_HOST,
  dialect: "postgres",
};
Note how we check for presence of _FILE variables, read their contents from disk if they exist and inject them into standard environment variables. This procedure would be exactly the same for any other migration/seed system (for example knex.js).
Frontend
Looking at our Simple frontend Dockerfile, the dockerization process is also pretty standard. We use nginx to serve our built Angular code.
Additionally, we use the same “trick” as with the backend to avoid rebuilding of node_modules when version in package.json is bumped. We also introduce another build stage, which builds and bundles application code. This means that source code will not be present in our final image, which is good. Finally, we also copy a custom Nginx configuration file into our image, which supports Angular routing (default config throws 404 when we access something else than root (’/’)).
Release script
Release script release.sh is a simple script, independent of the project we use it in. It works as follows:
- Run Docker build and build the image
- Log in to Docker container registry
- Bump version of the project (in our case using
yarn version) - Tag the image with new version
- Push images to Docker registry
The script is interactive and prompts the user for all steps before doing anything critical. The only requirement for the script is the release.env file, which contains URL and username for container registry and image name.
Before you can run the script, you should create your image repository on your container registry of choice. If this is Docker hub, you should create a repository here. After creating the repository, enter its name into release.env. You will have to create two repositories; one for frontend and one for backend and use this script in both of them (I recommend placing files into bin directory of both projects).
Bringing it all together with the DevOps project
We will create a third project, which will take care of deploying the application. It will be checked into version control, allowing anyone with sufficient permissions to update the application. The state of files in version control will also show the current state of your application on your production server (e.g. all versions and container architecture).
Here is the project for reference: DevOps project.
Application architecture
Let’s talk for a bit about the architecture of our application. We will have 4 application containers; namely frontend, backend, database and database admin. From Docker’s point of view, they will not be exposing any ports to the outside world. Instead, we will have another container, called a proxy, sitting in front of these containers, accepting every request and forwarding it to containers. This proxy will define all virtual hosts and ports to forward the requests to containers. In production, this proxy will also take care of SSL certificates.
Local testing Swarm file
This step will allow us to test our swarm locally with docker-compose (without swarm mode) before deploying it live. To begin, we create a docker-stack.dev.yml.
Let’s walk through each part of the system.
The proxy
We use the image nginx-proxy, which is an automated reverse proxy for docker containers. In other containers we will specify some metadata using environment variables, which will tell this container what kind of configuration to generate for it.
proxy:
  container_name: simple_prod_proxy
  image: jwilder/nginx-proxy:latest
  ports:
    - "80:80"
  volumes:
    - /var/run/docker.sock:/tmp/docker.sock:ro
Frontend
We use our own frontend image for frontend. Environment variables VIRTUAL_HOST and VIRTUAL_PORT tell nginx-proxy the configuration to generate and use for this container - requests to simple.leonpahole.com.local will be forwarded to frontend container on port 80. Frontend container on port 80 will return the compiled Angular code - therefore, this URL will serve our application UI.
frontend:
  container_name: simple_prod_frontend
  image: leonpahole/simple-frontend-angular:latest
  environment:
    - VIRTUAL_HOST=simple.leonpahole.com.local
    - VIRTUAL_PORT=80
  depends_on:
    - api
Backend
We use our own backend image. This time environment variables for nginx-proxy will enable this container to be reachable on api.simple.leonpahole.com.local on port 4000.
Additionally, we supply some non-secret environment variables: NODE_ENV, DB_NAME and DB_HOST.
Finally, we also utilize Docker secrets to provide two secret environment variables: DB_USERNAME through DB_USERNAME_FILE and DB_PASSWORD through DB_PASSWORD_FILE. The entrypoint script of our application will properly perform reading of these files and injecting their values into our application. Note that the secrets are injected by Docker and available for us in /run/secrets/<secret name>. We also have to specify which secrets our container needs under secrets: declaration.
api:
  container_name: simple_prod_api
  image: leonpahole/simple-backend-nodejs:latest
  depends_on:
    - db
  environment:
    - NODE_ENV=production
    - DB_NAME=simple
    - DB_USERNAME_FILE=/run/secrets/db_username
    - DB_PASSWORD_FILE=/run/secrets/db_password
    - DB_HOST=db
    - VIRTUAL_HOST=api.simple.leonpahole.com.local
    - VIRTUAL_PORT=3000
  secrets:
    - db_username
    - db_password
Database
Here we also use secrets to inject username and password of the database. Note that it is up to the image’s vendor to support Docker secrets - most popular containers support them and Postgres is one of them.
Note that we don’t expose anything to nginx-proxy, since database should be as locked down as possible.
db:
  container_name: simple_prod_db
  image: postgres:12
  volumes:
    - dbdata:/var/lib/postgresql/data
  environment:
    - POSTGRES_DB=simple
    - POSTGRES_USER_FILE=/run/secrets/db_username
    - POSTGRES_PASSWORD_FILE=/run/secrets/db_password
  secrets:
    - db_username
    - db_password
Database admin
We expose the admin interface to nginx-proxy and make it available on db.simple.leonpahole.com.local. Please note that the best idea is to secure this interface as much as possible. You can for example enable multi-factor authentication or lock the interface to a specific IP (e.g. VPN IP) using iptables.
dbadm:
  container_name: simple_prod_db_admin
  image: adminer
  depends_on:
    - db
  environment:
    - VIRTUAL_HOST=db.simple.leonpahole.com.local
    - VIRTUAL_PORT=8080
All secrets
We need to specify the source of our secrets under secrets: declaration. Since we will be testing this locally, and we won’t actually use Docker swarm, but Docker compose instead, we will specify secrets as text files. These text files will live in dev_secrets in our repository, and they can be checked into version control, as they are not production secrets (except any external API keys - these should not be in version control). Docker compose will inject these secrets the same way that Docker swarm does, but keep in mind, that this is not in any way secure - it is just a way to test secrets locally.
secrets:
  db_username:
    file: ./dev_secrets/db_username.txt
  db_password:
    file: ./dev_secrets/db_password.txt
Local /etc/hosts file
In order to test local domains we specified in VIRTUAL_HOST variable, we need to modify our /etc/hosts to point these domains to 127.0.0.1. Here is my /etc/hosts/:
127.0.0.1       simple.leonpahole.com.local
127.0.0.1       api.simple.leonpahole.com.local
127.0.0.1       db.simple.leonpahole.com.local
Running
We can now run the system. Use command docker-compose -f docker-stack.dev.yml up -d and visit your local domains (in my case api.simple.leonpahole.com.local, db.simple.leonpahole.com.local and simple.leonpahole.com.local). Note that the connection between frontend and backend will not work as the API URL in your frontend should point to something like https://api.simple.leonpahole.com (in my case). You can, however, add this local link to your frontend environment and activate it using a query parameter (e.g. with ?local=yes).
The most important thing to test is if all containers are running.
Production stack file
Now that we have a local development stack file that works, we will create the production stack file docker-stack.yml. The file has some differences compared to the development file.
The proxy
We expose nginx-proxy on port 443 as well as port 80.
We also add some volumes and a label to connect this container with the Let’s encrypt companion container.
proxy:
  image: jwilder/nginx-proxy:latest
  labels:
    com.github.jrcs.letsencrypt_nginx_proxy_companion.nginx_proxy: "true"
  ports:
    - "80:80"
    - "443:443"
  volumes:
    - conf:/etc/nginx/conf.d
    - vhost:/etc/nginx/vhost.d
    - html:/usr/share/nginx/html
    - dhparam:/etc/nginx/dhparam
    - certs:/etc/nginx/certs:ro
    - /var/run/docker.sock:/tmp/docker.sock:ro
Let’s encrypt certificates container
We use letsencrypt-nginx-proxy-companion to automatically generate our certificates and inject them into nginx-proxy through shared volumes. We can also specify some options, like the e-mail for Let’s encrypt certificates.
letsencrypt:
  image: jrcs/letsencrypt-nginx-proxy-companion
  volumes:
    - conf:/etc/nginx/conf.d
    - vhost:/etc/nginx/vhost.d
    - html:/usr/share/nginx/html
    - dhparam:/etc/nginx/dhparam
    - certs:/etc/nginx/certs:rw
    - /var/run/docker.sock:/var/run/docker.sock:ro
  environment:
    - DEFAULT_EMAIL=leonnieen@gmail.com
Frontend
We fix the domain to a proper domain without .local suffix and tell Let’s encrypt companion container about the domain name with LETSENCRYPT_HOST variable. This variable should have the same value as VIRTUAL_HOST variable.
We also specify a version for our container instead of using the latest tag. This is very important because it allows you to track version updates on git and rollback versions really quickly.
frontend:
  image: leonpahole/simple-frontend-angular:0.0.3
  environment:
    - VIRTUAL_HOST=simple.leonpahole.com
    - LETSENCRYPT_HOST=simple.leonpahole.com
    - VIRUTAL_PORT=80
  depends_on:
    - api
    - proxy
    - letsencrypt
Backend
Similarly to frontend container, we specify a proper domain, add LETSENCRYPT_HOST variable and specify the version of the container.
api:
  image: leonpahole/simple-backend-nodejs:0.0.3
  depends_on:
    - db
    - proxy
    - letsencrypt
  environment:
    - NODE_ENV=production
    - DB_NAME=simple
    - DB_USERNAME_FILE=/run/secrets/db_username
    - DB_PASSWORD_FILE=/run/secrets/db_password
    - DB_HOST=db
    - VIRTUAL_HOST=api.simple.leonpahole.com
    - LETSENCRYPT_HOST=api.simple.leonpahole.com
    - VIRTUAL_PORT=3000
  secrets:
    - db_username
    - db_password
Database
We don’t make any changes here (except remove container_name directive.)
db:
  image: postgres:12
  depends_on:
    - proxy
    - letsencrypt
  volumes:
    - dbdata:/var/lib/postgresql/data
  environment:
    - POSTGRES_DB=simple
    - POSTGRES_USER_FILE=/run/secrets/db_username
    - POSTGRES_PASSWORD_FILE=/run/secrets/db_password
  secrets:
    - db_username
    - db_password
Database admin
We specify a production domain, and add LETSENCRYPT_HOST.
adminer:
  image: adminer
  depends_on:
    - db
    - proxy
    - letsencrypt
  environment:
    - VIRTUAL_HOST=db.simple.leonpahole.com
    - LETSENCRYPT_HOST=db.simple.leonpahole.com
    - VIRTUAL_PORT=8080
Secrets
This time secrets will be injected into our containers by Docker swarm. This means that secrets will be external, and we should declare them as such.
secrets:
  db_username:
    external: true
  db_password:
    external: true
Deployment using Ansible
We will use Ansible to install all required packages, initialize the swarm, install secrets and deploy our stack.
I recommend the following directory structure:
ansible/
  files/docker-stack.yml
  vars/
    vars.yml
    secret_vars.yml
  deploy.yml
  production
  requirements.yml
Example directory can be found here.
Production file
In the file ansible/production we put an IP address of our server. I recommend to not check out this file into version control, but this is debatable.
Requirements file
In this file we put requirements of our Ansible playbook in form of roles. We need the role to install docker, so we specify the following requirement:
---
- src: geerlingguy.docker
Stack file
We put our production stack file into directory files/ so that Ansible will be able to find it and deploy it. We could instead deploy without the file and specify each service directly in the Ansible playbook, but my preference is to use the file, as I find it more manageable. Another option is to use a template (this can be useful if you have multiple environments).
Variables
Our Ansible playbook will need to access certain variables to properly perform its job. We have already specified the IP address of our server in the production file, but we also need to provide secrets, name of the stack file, user groups etc. I have divided the variables into secret variables (should not be checked into version control or at least encrypted with Ansible vault before doing so) and normal variables (should be checked into version control).
In file vars/vars.yml we specify the following variables:
swarm_user_group: swarm
opt_stack_directory: simple # defines a directory in /opt to copy stack file into
stack_file: docker-stack.yml # name of stack file in files/ directory

stack_name: simple
In file vars/secret_vars.yml we specify the following secrets:
# don't put this on version control!
ansible_user: myuser
ansible_ssh_private_key_file: /home/leon/.ssh/id_rsa

# this is only needed if you use password for sudo
# ansible_become_password: mypassword

# use real passwords in production and avoid common usernames like root or admin
docker_secrets:
  db_username: admin_simple
  db_password: 86:_JA76$S#s9_(
#
# this is only needed if your images are private - you can leave it commented out if they are public
# docker_registry_url: docker.io # docker hub
# docker_registry_username:
# docker_registry_password:
Deployment playbook
Note: the playbook is adjusted to work on Ubuntu based systems. It has been tested on Hetzner and Digital ocean Ubuntu servers. You will need to adjust it if your server uses a different package manager than apt.
The playbook deploy.yml performs the following tasks:
- Update apt cache
- Install docker
- Install pip libraries, needed for Ansible-docker communication
- Create a group for swarm (name given in
vars.yml) and add the current user into it - Create a directory (name given in
vars.yml) to hold a stack file and give users in swarm group permissions to access it - Copy the stack file into created directory
- Initialize swarm (equivalent to
docker swarm init) - Create secrets (given in
vars_secret.yml) - If required, log in to Docker registry (if you have private images)
- Deploy the stack file (equivalent to
docker stack deploy) - Log out of Docker registry, if log in was performed
We can run the playbook with:
ansible-playbook deploy.yml -i production
Note that all 11 steps need to be performed only the first time we deploy. Afterwards, to just update the stack file, we can perform only steps 6, 9, 10 and 11. To make this easier, these tasks are tagged with tag update and can be run with:
ansible-playbook deploy.yml -i production --tags "update"
If new secrets have been added to your application or you want to change some of them, you should also use the tag secrets, which tags task number 8. The command would thus become:
ansible-playbook deploy.yml -i production --tags "update,secrets"
There are two more tasks added that never run and take care of cleaning up and removing our application. We can run them by adding “remove” tag:
ansible-playbook deploy.yml -i production --tags "remove"
Migrations and seeds
You might notice that no migrations or seeds have been run yet in the deployment process. For now, we need to run such “one-off” tasks manually.
Therefore, we first ssh into our server and run docker ps. This will give us a list of all containers. Then we find a name of our backend container and execute seeds and migrations. In my case:
docker exec <container name> yarn migrate
docker exec <container name> yarn seed
Please note that container name will change as you run updates, so you have to re-run docker ps each time to get the current container name.
Development and deployment workflow
Here is how the workflow using this configuration would be done:
- Develop your frontend and backend locally.
- When ready to deploy, run
release.shon your projects and tag built images with the new version. - In the DevOps project, change the versions of your containers in
docker-stack.ymlto new versions (don’t use thelatesttag). - Run
ansible-playbook deploy.yml -i production --tags "update" - Execute any migrations or seeds if necessary
If you need to rollback, simply change versions of your images in docker-stack.yml and re-run the deployment, then undo migrations if needed (although it is better if your app is backwards compatible with data schemas, as you will lose data if you undo migrations).
Summary
Overall, in my opinion, the presented workflow is great for Docker swarm deployment on a single node. Application architecture and versions are neatly connected into a single file (docker-stack.yml) and updates/rollbacks are done with a single command.
In the future blog post, I will also discuss how to substitute nginx-proxy with Traefik, as I find Traefik to be more robust, useful and simpler.